Docs / Set it up
2. Upgrade your Telnyx account to Paid
A Telnyx Trial account rejects your building's calls. Adding about $5 of credit and finishing a few checks upgrades it to Paid, which fixes it. Here is exactly what to do.
This is the step most people skip, and the reason many first attempts fail. The short version: add about $5 of credit, and finish the checks below.
Seen in the wild
Everything was set up correctly. A test call from the owner's own phone worked. The building's intercom then hit "the customer you have dialed is currently not available." The cause was not Knock and not the building: the Telnyx account was still on Trial, and a Trial account only accepts calls from the one number you verified.
Why you need it
Telnyx's trial documentation says a trial account can only receive calls from your verified number, and can only call it. Your building's intercom is neither. A Paid account removes that limit. In the setup this guide is based on, calls from a phone that was not the verified one went straight through once the account was Paid. Telnyx's own pages don't spell that out, so run the quick test at the end of this page.
Other Trial limits worth knowing: calls are capped at 10 minutes, you can buy one number, and the number is reclaimed within 30 days if the account isn't upgraded.
What the upgrade needs
Open the account menu (top right), choose Account settings, then the Account Levels tab. The Paid card lists everything required:
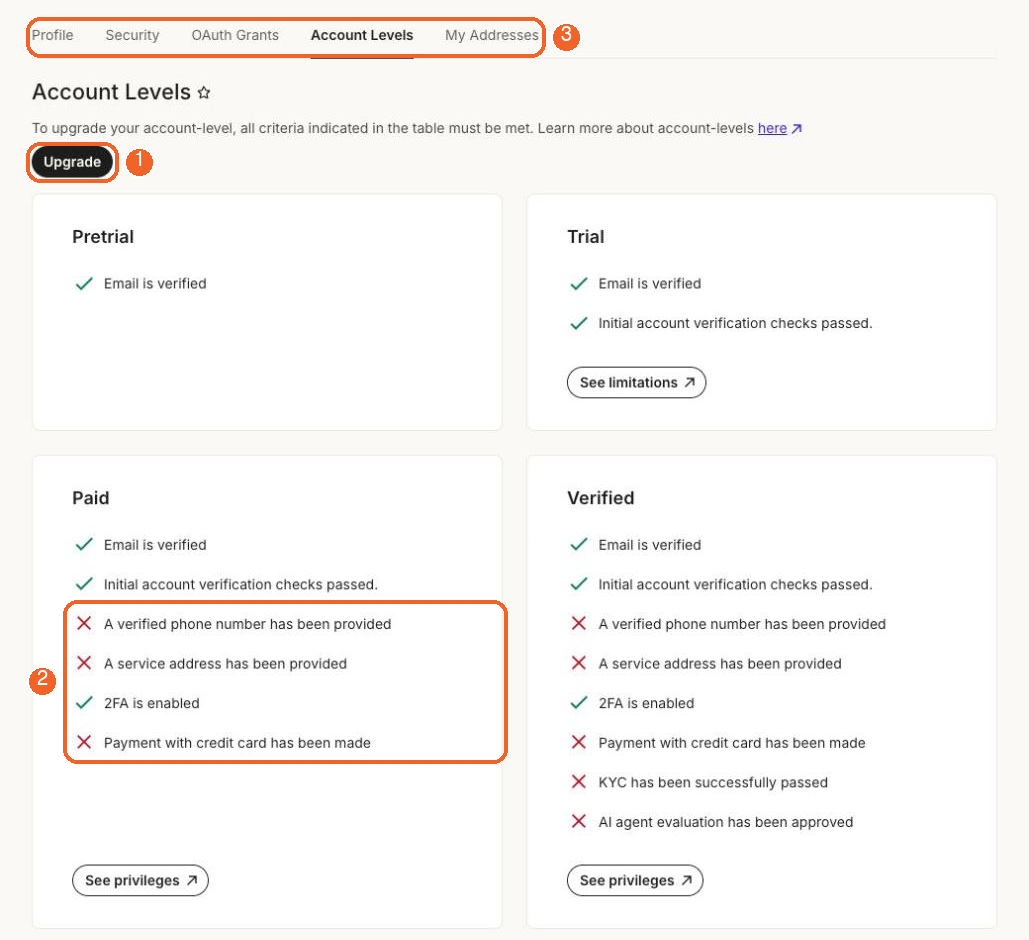
| Requirement | Where to do it |
|---|---|
| Email verified | Done when you signed up |
| Initial checks passed | Done in the previous step |
| A verified phone number | Account settings, Profile |
| A service address | Account settings, My Addresses tab |
| Two-factor sign-in enabled | Account settings, Security tab |
| A payment made with a credit or debit card | Account menu, Manage billing or Add credit |
Step by step
- Go to Account settings, Security and turn on two-factor authentication. An authenticator app is the safest option.
- Go to Account settings, My Addresses and add your home address. Telnyx uses it for emergency-calling rules; it is a normal requirement for phone numbers.
- Go to Account settings, Profile and make sure your mobile number is verified.
- Open the account menu (top right), choose Add credit, and add a card and about $5. That is what the card-payment tick needs, and it was enough in our setup. Telnyx's pages we checked don't state a minimum, so it may ask for more in some countries. The credit is a balance you spend (see Costs), not a fee.
- Return to Account Levels and press Upgrade.
Payment details are yours to enter
Only you should enter card details, directly on Telnyx's own pages. Don't paste a card number anywhere else.
What changes after you upgrade
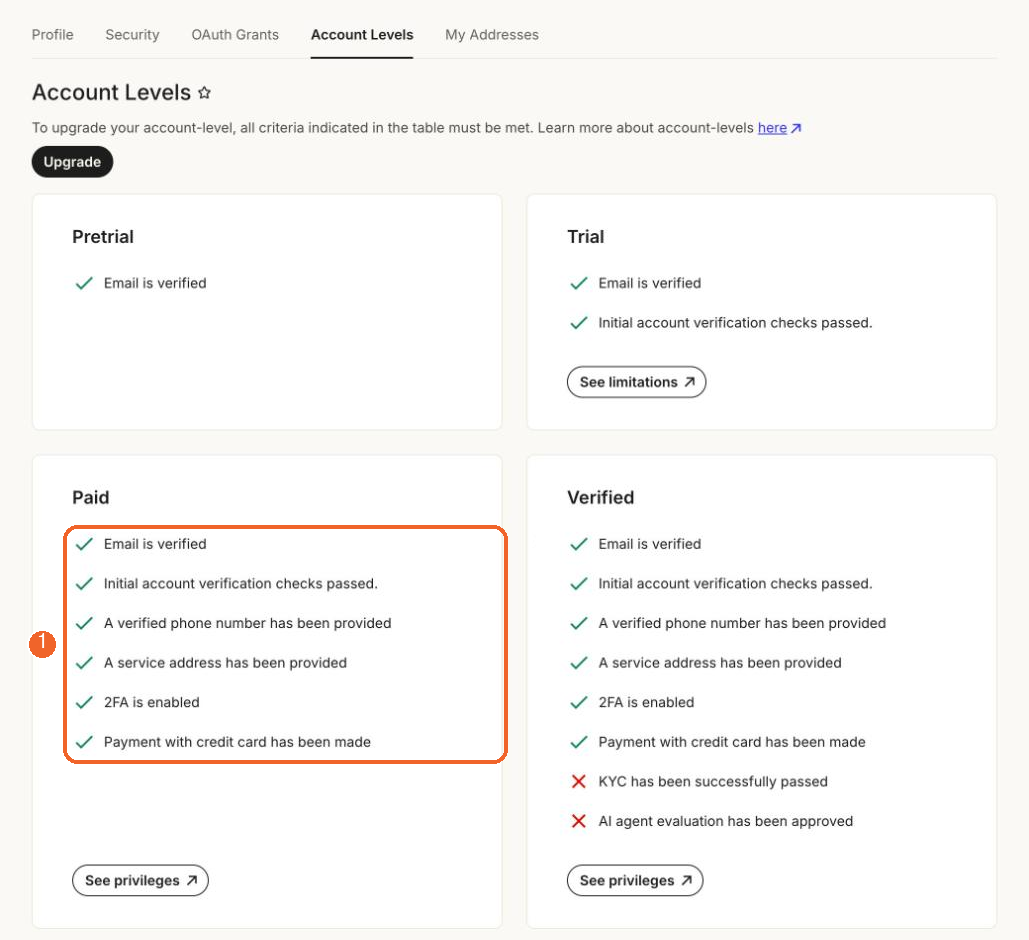
- The Paid card on Account Levels shows all green ticks. The Verified card below it keeps two red crosses (KYC and an "AI agent evaluation"). You don't need those.
- You can receive calls from any number, including your building's intercom (see the test below).
- Telnyx still adds an automated-call announcement before spoken words. Knock is silent by default, so you won't hear it. Details on Settings.
- There are outbound limits: Telnyx documents 100 outbound calls a day, 10 an hour, 5 at once, and a limited set of destination countries. Knock's backup-number call is an outbound call, so make sure your backup number's country is allowed.
- You can buy numbers only in your account's own country.
Test that it worked
Don't take it on trust. Once your Telnyx number exists (page 3), call it from a phone that is not the one you verified. If Knock rings and you can tap Open door, the limit is gone. If you hear "not available," check the Account Levels page and open Troubleshooting.
Next: Buy a phone number