Docs / Set it up
4. Create the Call Control app
The Call Control application tells Telnyx where to send call events, and it is how Knock answers calls and presses the unlock digit. Four short sub-steps.
Telnyx needs three things wired together: an outbound voice profile, a Voice API application, and your number. You do them in that order.
A. Create an outbound voice profile
An outbound voice profile is what lets Knock place calls: the wizard's test call to your phone, and the optional backup call. Without it those calls fail.
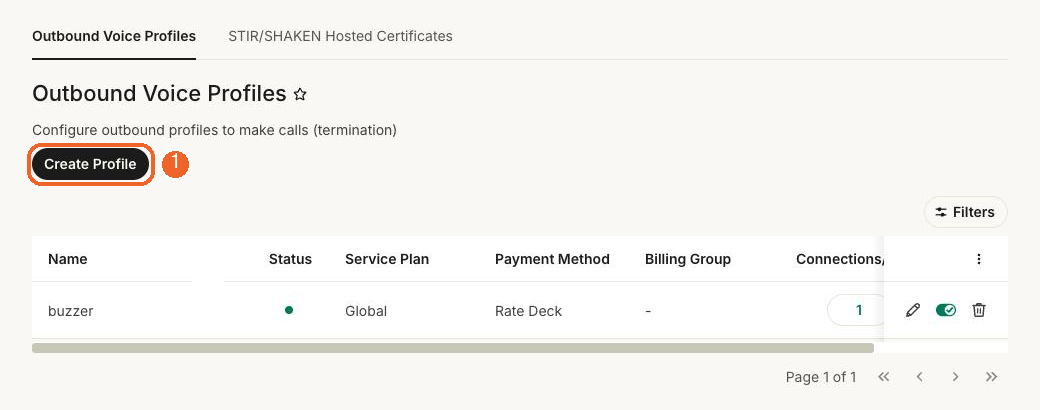
- In the portal menu choose Outbound Voice (under Voice).
- Press Create Profile.
- Name it
knock. - Keep the defaults. If the form asks which destinations are allowed, make sure your own country is ticked (and your backup number's country, if different).
- Save.
B. Create the Voice API application
- In the portal menu choose Programmable Voice, then Voice API Applications.
- Press Create Voice App.
The form looks like this when it's filled in. The orange rings on the picture are labelled ring 1 to ring 4, and the steps below say which ring to look at. (Tap the picture to enlarge it.)
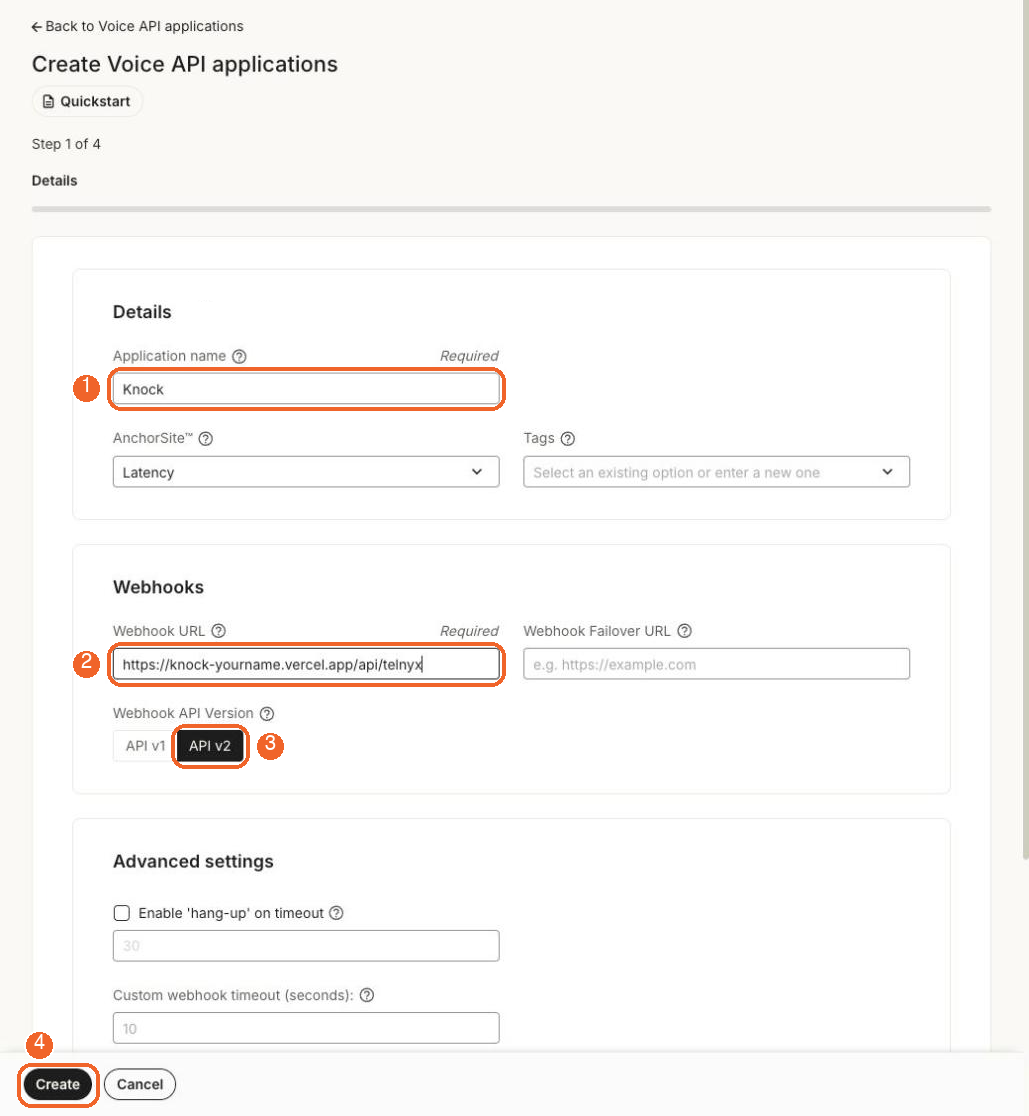
- Application name (ring 1): type
Knock. - Leave AnchorSite on its default (Latency) and Tags empty.
- Webhook URL (ring 2): your Knock address followed by
/api/telnyx. For examplehttps://knock-yourname.vercel.app/api/telnyx. Copy your address from your browser's address bar and add/api/telnyxyourself so there are no typos. - Leave Webhook Failover URL empty.
- Webhook API Version (ring 3): choose API v2. This matters: Knock verifies version-2 signatures.
- Leave Advanced settings alone for now (see the tip below).
- Press Create (ring 4).
About the DTMF Type setting
Under Advanced settings there is a DTMF Type (the default is RFC 2833). That is how Telnyx sends the unlock tone. If everything works but your building's door never unlocks, this is the first thing to try changing. Leave it for now; see Troubleshooting.
Get the webhook address exactly right
No spaces, no trailing slash, and https (not http). It must end in /api/telnyx. A typo here is the single most common reason calls reach Telnyx but never reach Knock.
C. Attach the outbound voice profile to the app
- Open the application you just created (the Edit link next to it).
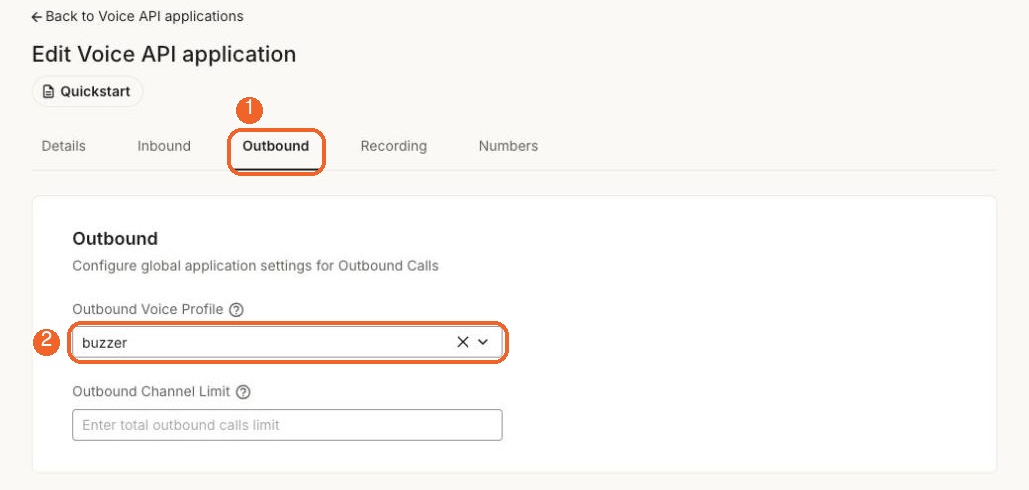
- It has tabs: Details, Inbound, Outbound, Recording, Numbers. Open Outbound.
- Under Outbound Voice Profile, choose the
knockprofile from step A. - Save.
D. Assign your number to the app
- In the same application, open the Numbers tab.
- Press Assign numbers and choose your Knock number.
- Save.
You can also check it from the number side: Phone Numbers, where the Connection/Application column should now read Call Control (or the name you gave the app).
What you should see
- Voice API Applications lists your app with the correct webhook URL.
- Phone Numbers shows your number with the app in the Connection/Application column.
Copy the application ID now
Open the application, Details tab. There is an Application ID, a long number. Copy it somewhere for the next page. This is TELNYX_CONNECTION_ID.
Next: Get your keys